Note: This is only available to Purple partners and white labels.
Within the Partner Portal, you can create and manage your own customers. You are able to see when the customer was added, how many groups, venues and users they have and their license details.
Click Management > Customers.
New customer
-
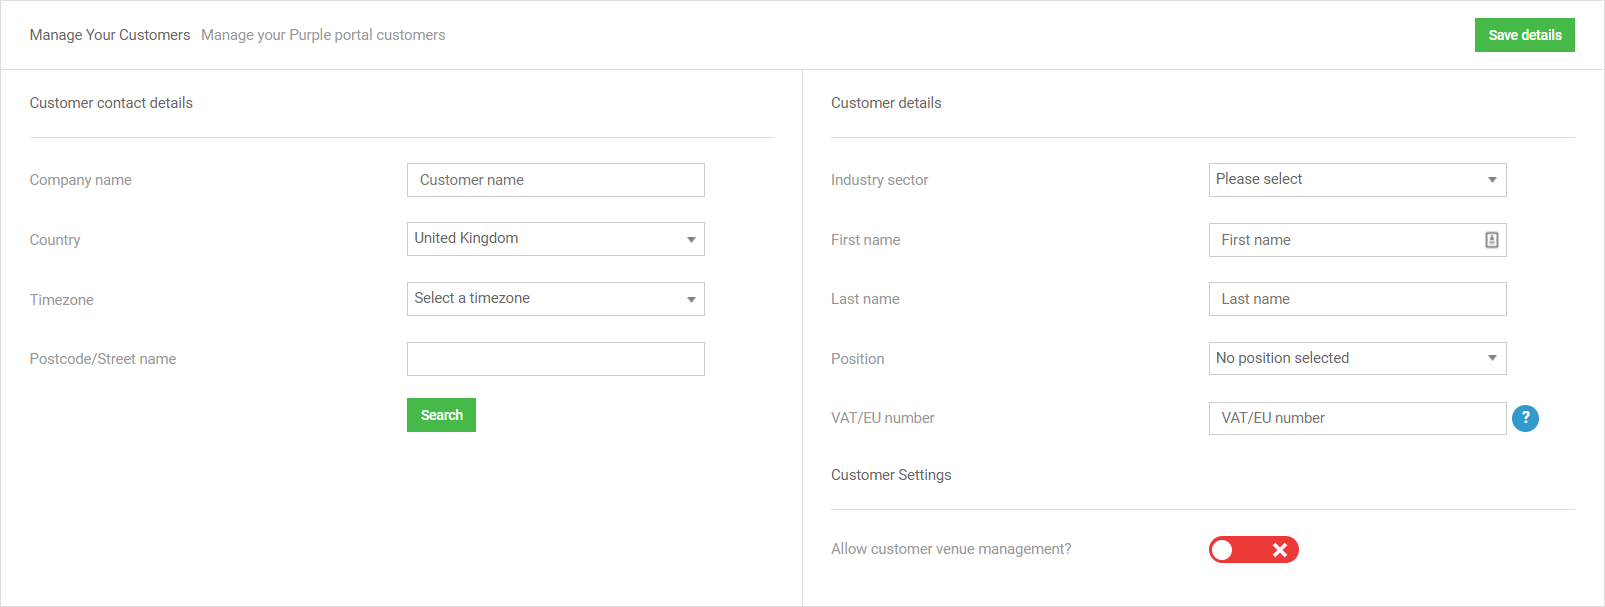
To add a new customer, click Create new customer > Add a single customer and complete the details as follows:
Customer name
The name of the customer or company.
Country
The country the customer is based in.
Timezone
Choose the customer's timezone from the list.
Postcode/Street name
Enter the post code or street name and click Search, select the correct address from the results shown. If the address is not shown, click Cannot find my address and enter the details manually.
Telephone
These fields show after you select or enter an address, complete them as appropriate with the customer's details.
Mobile
Email
Website
Industry sector
Choose the industry sector from the list, there is an Other category under each section.
First name
Main contact's name.
Last name
Position
The position of the main contact.
VAT/EU number
This is optional, the company VAT or EU number for tax purposes.
Allow customer venue management
Select this option to allow the customer to manage their own venues.
-
Click Save details, you can then change the customer details, add venues and groups, add users, change the settings or add webhooks.
Customer level settings
These options are only available at customer level and above (i.e. reseller level).
|
Allow customer venue management |
Enables the customer to add hardware and venues. |
|
Roaming seamless login |
Forces seamless login at all venues for the company. Visitors who have visited one venue can seamlessly log in at another venue. |
|
Seamless timeout |
Sets a seamless expiry time where visitors are sent to the offline splash page and need to sign back in after a period of time. When you enable this you must set the following:
|
|
Enable Profile Portal |
Enables profile portal for this company. |
|
Allow OneClick login method |
Enables the option to add OneClick login to splash pages. You cannot capture any data about visitors who use the OneClick login method. |
|
Complete transaction outside of captive portal |
Grants visitors a temporary session to complete a payment transaction. To complete payment transactions in the captive portal you must whitelist all of the bank domains on your controller. |
|
Disable the additional gender options |
Disables Non-binary and Prefer not to say gender options. |
Company Logo
Add a logo for your company, click Browse, select the image to upload and click Open.
Custom SSID Settings
Enable this option to assign a different access journey to a secondary SSID.
SMS/Email Limits
You can limit the number of emails and/or SMS messages that can be sent by a company.
|
Starting Monthly Limit |
The initial number of emails or SMS messages the company can send for the month, this renews each month and any changes made to this value take effect in the following month. |
|
Additional Monthly Limit |
An additional number of emails or SMS messages the company can send for the current month, this resets to 0 at the start of the next month. |
If you make any changes to these values, click Save.
Email verification
Enables email verification across all venues. Visitors who authenticate via the registration form are sent an email to verify their email address on their first visit only. If visitors do not verify their email address they cannot use seamless login.
You can remove visitors from the WiFi and force them to re-authenticate if they haven’t verified their email address within a configurable amount of time. This is triggered by a RADIUS Change of Authorization (CoA) request, sent to the Access Point/Controller from Purple’s cloud hosted RADIUS server (this may require an inbound firewall rule for UDP port 3799). Most hardware supports CoA requests, for more information about how to configure this for your hardware, refer to CoA/Disconnect Configuration.
You can see which visitors have verified their email address within Marketing > CRM, click the visitor name, next to the name it shows if the visitor is verified or unverified.

