This guide will walk you through setting up your venue to help you get started using Purple WiFi.
Step 1: Registration Form
Begin your journey by filling out the customer registration form on the Purple WiFi website. Alternatively, visit the link here.
Step 2: Email Verification
Once you've registered, check your email for a verification message. Click the link contained in the email to confirm your account - be mindful that the link is only valid for 24 hours.
Step 3: Getting Started
After confirming your email address, wait for another email that invites you to kick-start setting up your account. Click on the Get Started link in this email.
Step 4: Portal Password
You will then need to create a new password to access your Purple WiFi account. Ensure your password is strong and secure to protect your information.
Step 5: Purple Launchpad
Once you've set your password, you will be directed to the Purple Launchpad dashboard. Click on Purple WiFi to start the onboarding wizard.
Step 6: Adding Your First Venue
Step 1 - Venue Information:
Enter your venue details, then click Next Step to continue.
Please note that this step must be completed before setting up anything else in the portal, so it’s not possible to close the wizard at this stage.
Step 2 - Design Splash Page:
Using the template, go ahead and create the splash pages.
Offline Splash Page: Displayed to visitors immediately upon connecting to the guest WiFi, before authentication.
Online Splash Page: Shown after successful authentication, once the visitor is fully connected to the internet.
Once you are satisfied with both splash pages, click Next Step to proceed with the setup.
Step 3: Add WiFi hardware:
Click Add WiFi Hardware, then enter a name, select the hardware type, and input the MAC address. If you're using one of our Hubs, choose Purple > Hub PRPGW1 from the list.
A full list of our supported hardware can be found here.
To obtain the placeholder settings (example below), please navigate to your hardware settings page.
A. From the dashboard, click on Management, then select Locations.
B. Under Venues & Groups, choose your venue and click on Hardware.
C. Click on the MAC address to enter edit mode, where you will see the option to view or download the full guide.
Note: You can follow the same steps above to add additional WiFi hardware as needed.
Step 7: Splash Page Preview
Follow the instructions outlined in the step-by-step guide until you have completed all the steps. Connect your device to the WiFi network. You should see the default splash page displayed upon connection.
This is the end of the setup.
Welcome Dashboard
Click the menu icon in the top bar and select Purple WiFi to access your dashboard. You'll find our most popular settings listed here for quick access.
Access journeys: Assign splash pages and other features of a journey.
Splash pages: Create and edit splash page designs.
Analytics: View detailed analytics reports
Management: Manage your venues, users and other settings.
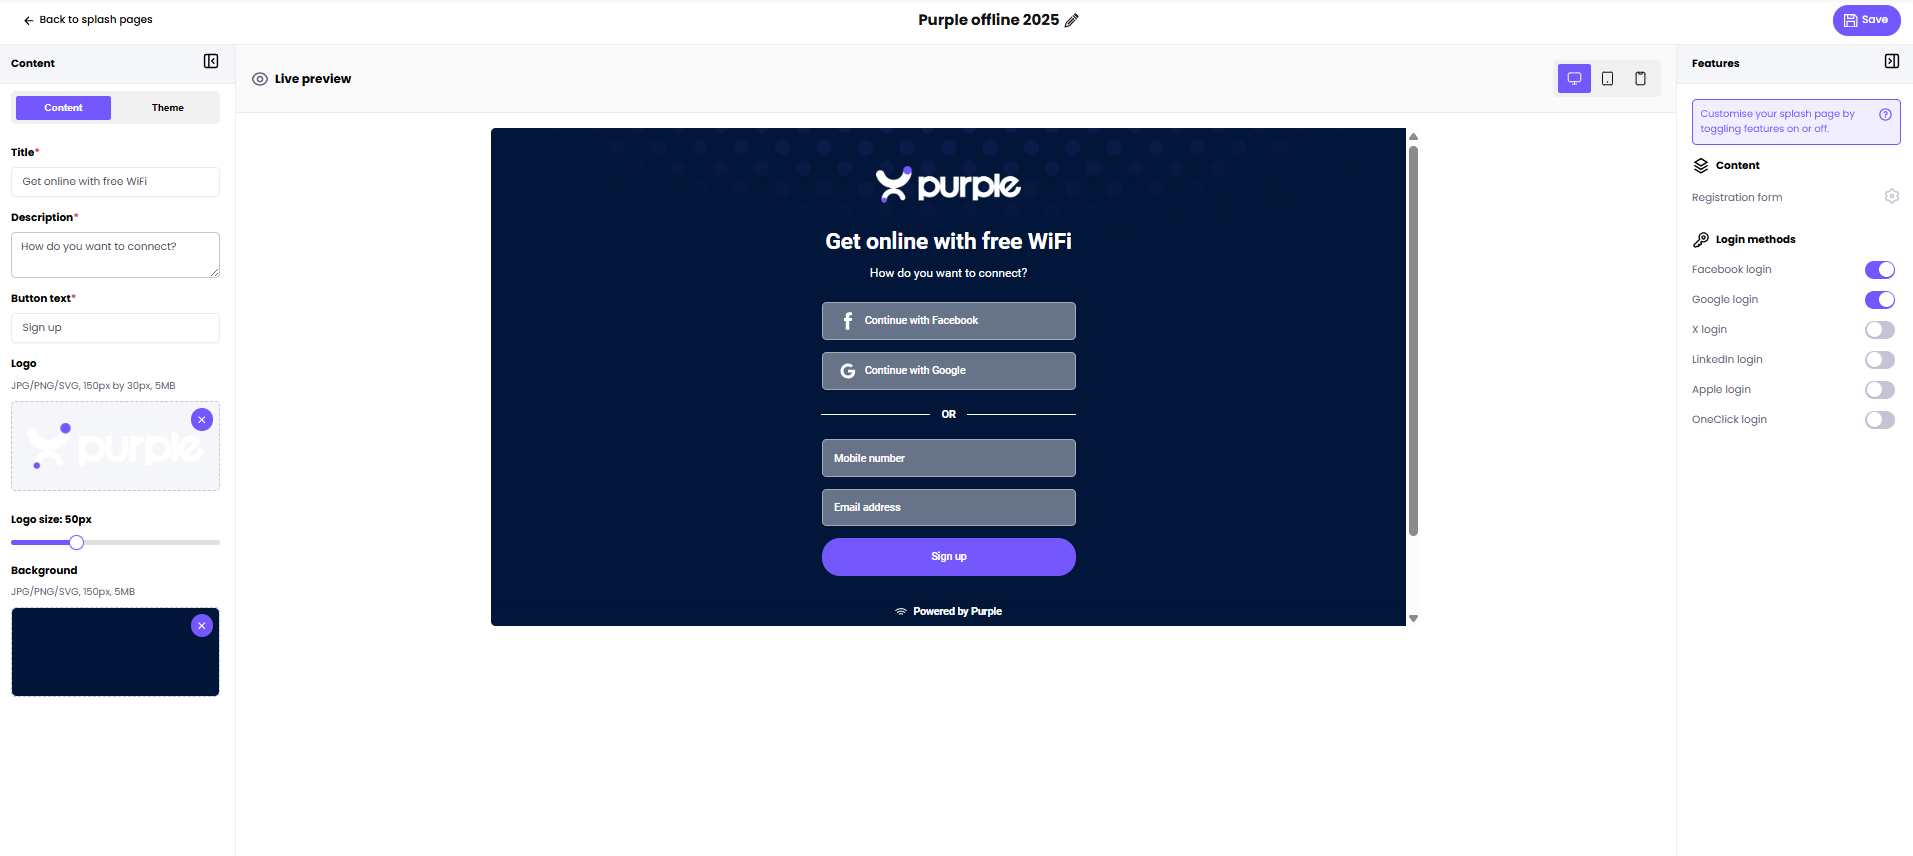
Splash Page Customisation
If you'd like to personalise your splash page, click Splash pages or navigate to Onboarding > Splash Page from the left menu.
Click on Create new splash page to get started.
-
Name: Give your splash page a clear, descriptive name.
-
Type:
Offline: Displayed to visitors immediately upon connecting to the guest WiFi, before authentication.
Online: Shown after successful authentication, once the visitor is fully connected to the internet. -
Editor:
Standard: Use the drag-and-drop builder (Recommended).
Custom HTML: For advanced users to build with their own code. -
Ownership scope: Select who can see and manage this page (e.g., customer, location).
-
Owned by: Choose the specific company or entity that owns this page.
| Splash Page Type | Splash Page Editor |
Click Create now to save and access the editor, and take a look at the page preview here.
Access Journey Setup
After customising your splash page, return to the Welcome dashboard and select Access journeys, or navigate to Onboarding > Access Journey to create a new journey.
Under the Splash page section, select the correct splash page from the drop-down option.
Finally, add Terms & Conditions before hitting Publish to make your splash page live.
Adding Additional User
Manage and invite additional portal users from Management > Users, ensuring that your team can assist with your venue’s WiFi management.
 Free Guest WiFi
 Purple App
 SecurePass
 Splash Access