Adding a Policy
Policies are the cornerstone of Shield.
They are where you choose what your users can and cannot access.
Filtering-PoliciesFiltering-Policies is a grouping for policies or schedules. A schedule is a set of policies applied at specific times. |
Policies
The default policy - is the basis for the creation of other policies. It cannot be deleted.
Edit existing policies by clicking the name link, or selecting the three dots icon on the right of a row.
Create a new policy with the create policy button. The three dots icon also provides a delete option, for all non-default policies.
Settings
Here you can (and must) assign your policy a name.
Categories
A policy has categories which enable easy blocking of groups of content.
When creating a new policy, the initial set of categories applied is taken from the default policy set.
Content Categories information
Hovering over the information icon shows a pop-up with a description of the category.
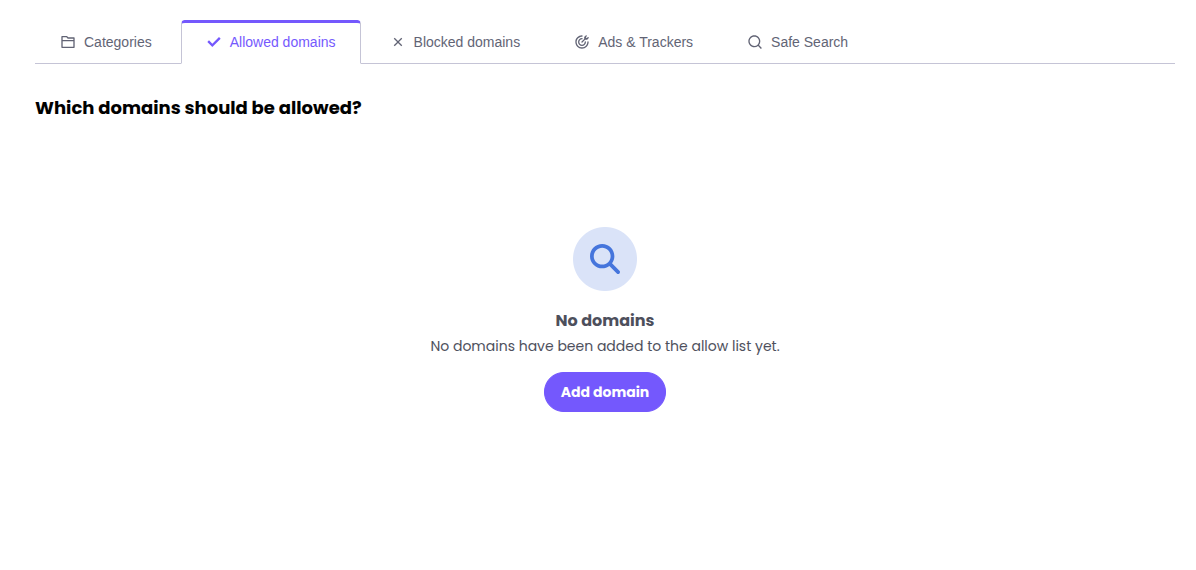
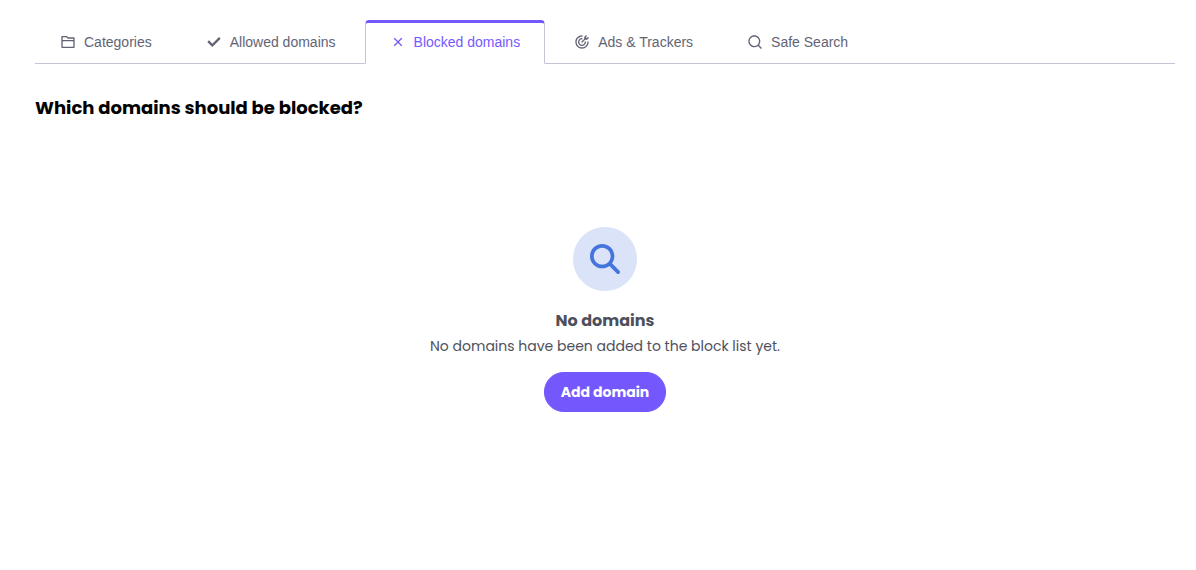
Allowed domains & Blocked domains
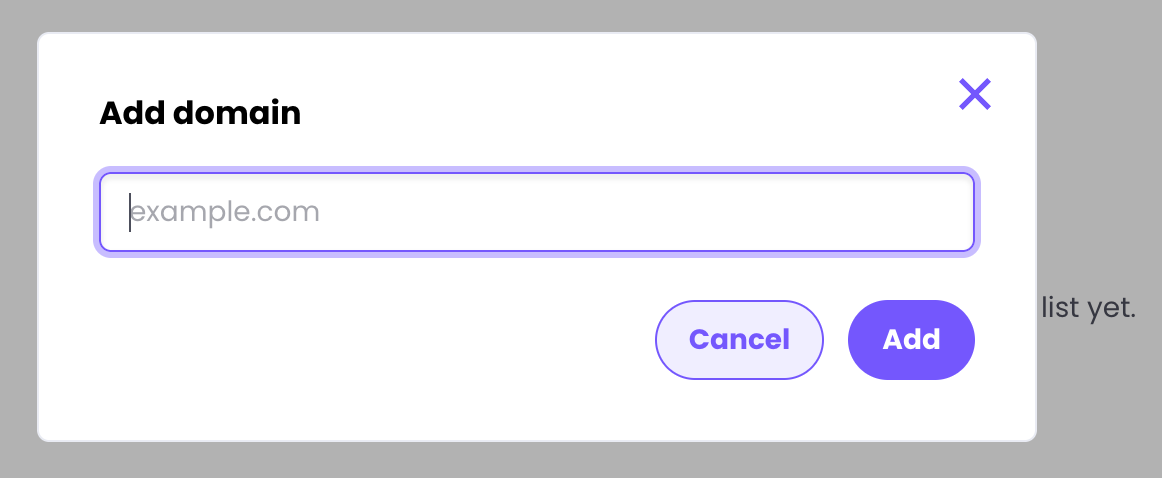
These tabs allow manual addition of a URL at a time. These also override category entries. These will initially be blank as categories automatically cover most eventualities. Click “add domain” on either section to explicitly allow or block it.
Ads & Trackers
You can explicitly block Ad servers and Trackers, from your network. There are two levels. Moderate and Strict. (The default is Disabled). The information boxes explain what each setting does and will be highlighted bold when selected.
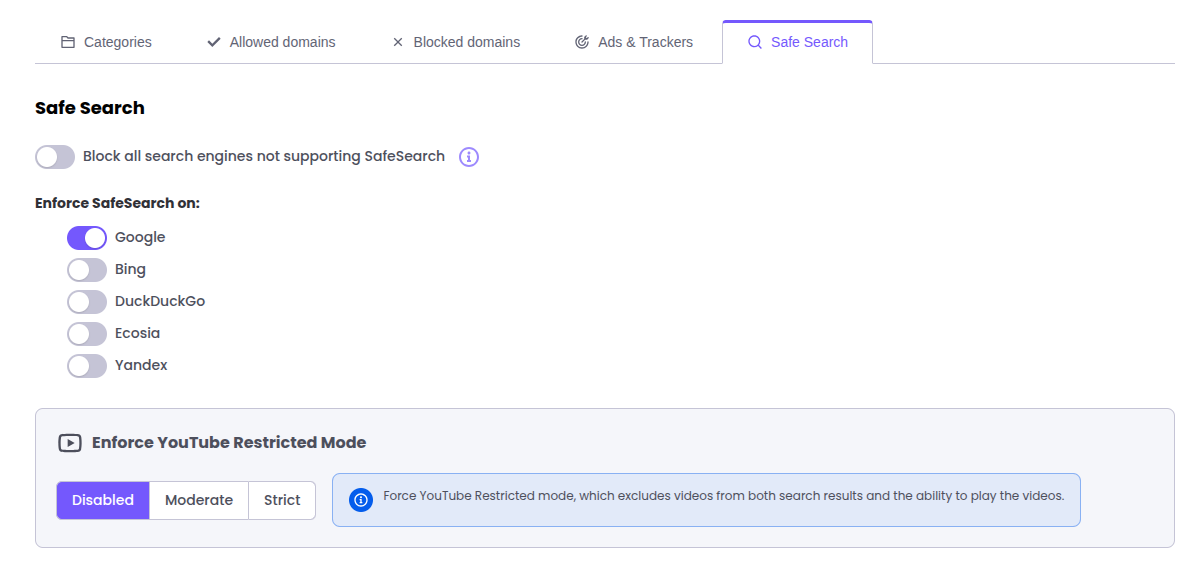
Safe Search
You can also enforce safe search on any search engine that supports it, and optionally block all search engines which do not.
Enforce YouTube Restricted Mode.
This allows control of whether video streaming is allowed (Strict will block the playing of videos, moderate will remove some content from search results)
Schedules
Schedules allow the application of different policies at different times. They are a grouping of policies and just like policies, they need to be applied to a venue to become active.
Schedules are made up of a 7 day week, divided into 15 minute time slots. As noted in the message:
The default policy is applied across the whole week. This ensures that when adding policies to specific time slots, you are still automatically protected by your default filter at any non-assigned times.
Dragging “slices” creates a pop-up selector for the policy to be applied.
Clicking on an added slice allows editing with the same options. Clicking on the bin icon on a slice allows deletion.
As always, don’t forget to “Save changes” at the top of the page to finalise your choices.
Don’t forget that with the exception of the default policy, policies and schedules don’t automatically get applied. They need to be explicitly assigned to a venue.
See the Venue management guide for more information.
 Free Guest WiFi
 Purple App
 SecurePass
 Splash Access